STEPS:
- Search for a phrase such as "executive portrait" or "PR headshot." Then Save your image.
- Go to Pixlr Editor. It has an X-press option too, but Editor gives more options
- Start by opening your desired image. (Note that although you can paste, Pixlr has some limitation on file sizes for pasting, so it's best to simply open the image.)
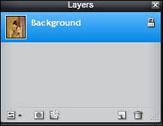 UNLOCK the layer by double clicking the lock on the Layers Palette. UNLOCK the layer by double clicking the lock on the Layers Palette.
- From the Toolbox on the left, choose the Marquee Tool.
- From the Control palette at the top, set a Feather of around 25.
- From the Control Palette, choose Elliptical marquee. Drag a marquee selection around the area of the photo you want to keep.
- Choose SELECT/Invert Selection.
- Press DELETE on the keyboard. Then choose SELECT/Deselect.
- From the Layers Palette, add a new layer (Empty) for the background. Then drag that layer to the bottom.
- Then fill it with a desired color. To fill, choose Fill (paint bucket). Then click anywhere on the layer.
- Add a rounded edge rectangle for a label (See the Jane Smith banner beneath the photo.)
- Create a new layer from the Layers Palette
- Choose the Shape Tool from the toolbar
- Use the Control palette to change to Round Edge. Make other adjustments as desired.
- Change the color and then draw the shape.
- Use the Type tool to type text. It will prompt you about the kind of layer.
- If time permits, try some effects from the Filter menu
To Save (It doesn't give you a location option. It goes in your download folder)
- Save the file as a Pixlr format in order to preserve the layers and to be able to manipulate.
- Save again as a JPEG format in order to use it in various software programs.
|
 Pixlr: Just a Quick Look ...