TUTORIAL: Using Photoshop Files in Pixlr
Good news. Pixlr.com is compatible with Photoshop files — to the extent that it can open .PSD files and maintain separate layers. There are some shortcomings, however. From what I have experienced, the file size must be under 3MB. Otherwise you will get a #2030 Error. Also, if the layers are too complex with many Photoshop groups, it becomes unwieldy in Pixlr because Pixlr does not maintain the groups; it spreads out all of the layers.
So for your exploration, I have a few files for you to practice with. In this exercise, we will take the sunrays layer of one file, and then combine it with the crowd from another file. There are lots of free Photoshop files at https://freepsdfiles.net. Although some of them are too big for Pixlr, they can be used in programs such as GIMP or Photoshop itself.

Objective: Create a banner that displays sunrays and stars along with a silhouette of a crowd at the bottom. Then you will add text and maybe other images finish it off.
- Download these two images and save them anywhere:
crowd2smaller.psd and Starssun.psd - Go to www.pixlr.com
- Open each image separately
- Decide on one of the crowd layers and add it to the sunray picture:
- EDIT/Select All
- EDIT/Copy
- Go to the sunray picture. EDIT/Paste
 On the sunrays picture, crop it to an appropriate height that looks like a banner (more rectangular).
 - Reduce the opacity of the yellow stars to refine its appearance.
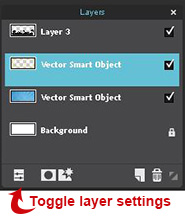
(If necessary, turn on Layer Options by choosing "Toggle Layer Options" in the Layers palette.)
- Use the "A" tool to write some text on the banner.
- If you chose the picture with the flags, try writing text on the flag(s).
(In order to rotate text, you must first Rasterize the layer with LAYER/Rasterize menu.) - In order subdue the blue rays, do these modifications:
- Add a new layer on top of the blue rays
- Fill it with a gold or orange-like color (Paint Bucket tool)
- Reduce the opacity to around 50
- From the filter menu, choose Night Vision or something like that