Photoshop Lesson
Objective: This lesson was geared specifically at creating a customized banner for blogger.com. However, the skills learned can be applied to any imagery.
At minimum, you must include these 4 items:
1) A photo or image of some kind, 2) Gradient filled area, 3) Any Custom Shape, 4) Some text
- Start with a new file -- 850px by 175px.
- Using the Gradient tool, create a gradient on the background by dragging the mouse cursor up or downward.
- To create the tubular looking bottom part:
-Add a new layer.
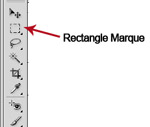
-Make a selection with the Rectangle Marquee Tool (NOT the Rectangle shape).
-Choose the Gradient tool again. Then from the Control Palette, choose Reflected Gradient. Then drag downward to apply another gradient. - Either paste your picture onto the file; or choose FILE/Place to add your picture. [ENTER]
- Choose the Custom Shape tool. On the Control palette, make sure the option is set to Shape Layer
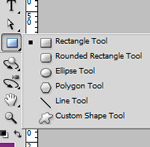
- Choose any shape and draw it on the page. For best results, choose ALL from the Options menu.

- Type your text as desired.
I suggest you use at least two text blocks to make it visually interesting. - Well, I think that's the minimum. Feel free to embellish