Photoshop Tutorial - Create a Banner Ad
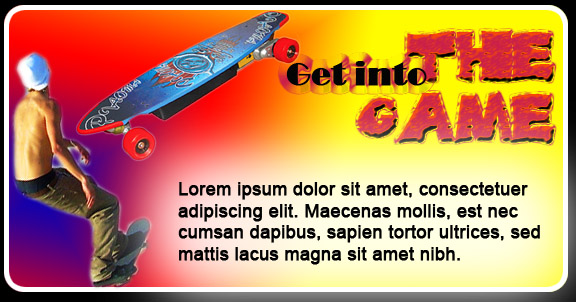
Objective: Create an image that looks like the one below. In order to assure that you demonstrate your ability to use these skills, I am asking that you make a similar layout. You are free to change the objects around, but I want to see all of the objects used. You may also change the theme if desired.
- Create a new file sized at around 800W x 600H pixels.
- Fill the background as desired.
- Then change your Foreground Swatch to another color to get ready for the next step.
- Hold down Custom Shape tool, and choose Rounded Rectangle.
- On the Control panel, choose Shape Layers option. Also on the Control Panel, change Radius to 20px.
- Draw a rectangle that is slightly smaller than your canvas.
- Stay on that layer and click LAYER/Layer Style, Blendiing Options in order to do the following:
- Create a 6px stroke and change its color as desired
- Create a Gradient. Modify the gradient as follows:
- change the Style to Diamond
- practice changing the Angle
- practice changing the Scale - Find two images that represent your theme. Paste them onto your canvas.
- Use various selection tools to isolate your images and delete the backgrounds. Be sure the images blend in smoothly.
- Type "Get Into" "THE GAME" into 2 different text boxes (so that you can manipulate them better).
- Apply a Style to accentuate the heading. (See Styles panel)
- Generate the dummy text ("Lorem ipsum...") from www.lipsum.com. Or you can type real text.
- For the text, change the font to size 16pt, with 23pt leading. (see Character panel)
- In order to get the faded white spot behind the Lorem Ipsum text, do this:
- Create a new layer behind your text layer.
- Use the Rectangular Marquee Tool to draw a box. Feather it at 18.
- Fill with white. Then reduce the opacity some so that it won't be so overwhelmingly bright.
- Feel free to improve it.